Rules
The use of various Advanced Computing services is described in the regulations on our official website.
Access and CroRIS
Access to all services is achieved by submitting a request through a web application which can only be accessed with an AAI identity. Depending on the nature of the scientific activity (defined in the right of access in the rulebook), the conditions for submitting requests are:
- Research project - the project must be verified in the science information system of the Republic of Croatia CroRIS
- Institutional project - a special category of research project that meets the following requirements:
- an application for the institutional project can be submitted by a person registered in the Register of Scientists
- the request can be submitted by a person who is not registered on any active project in the CroRIS
- maximum project duration is one year
- project manager can request an extension of the project in case all the above conditions are met
- thesis preparation - preparation of final, graduate, specialist and doctoral theses at public universities and public scientific institutes
- practical teaching - practical teaching within courses at universities (access to Supek is not possible with this request type)
Web application

The diagram above shows the procedure for submitting a request and registering a user
Submitting an application
The request for use is submitted by pressing "New request"(red button at the top of Figure 1), where it is necessary to mark the nature of the activity via the drop-down menu "Request type" (at the top of Figure 1):
- "Research project" - It is necessary to select one of the offered projects verified in the CroRIS system
- "Practical class" or "Thesis project" - no need to select a project
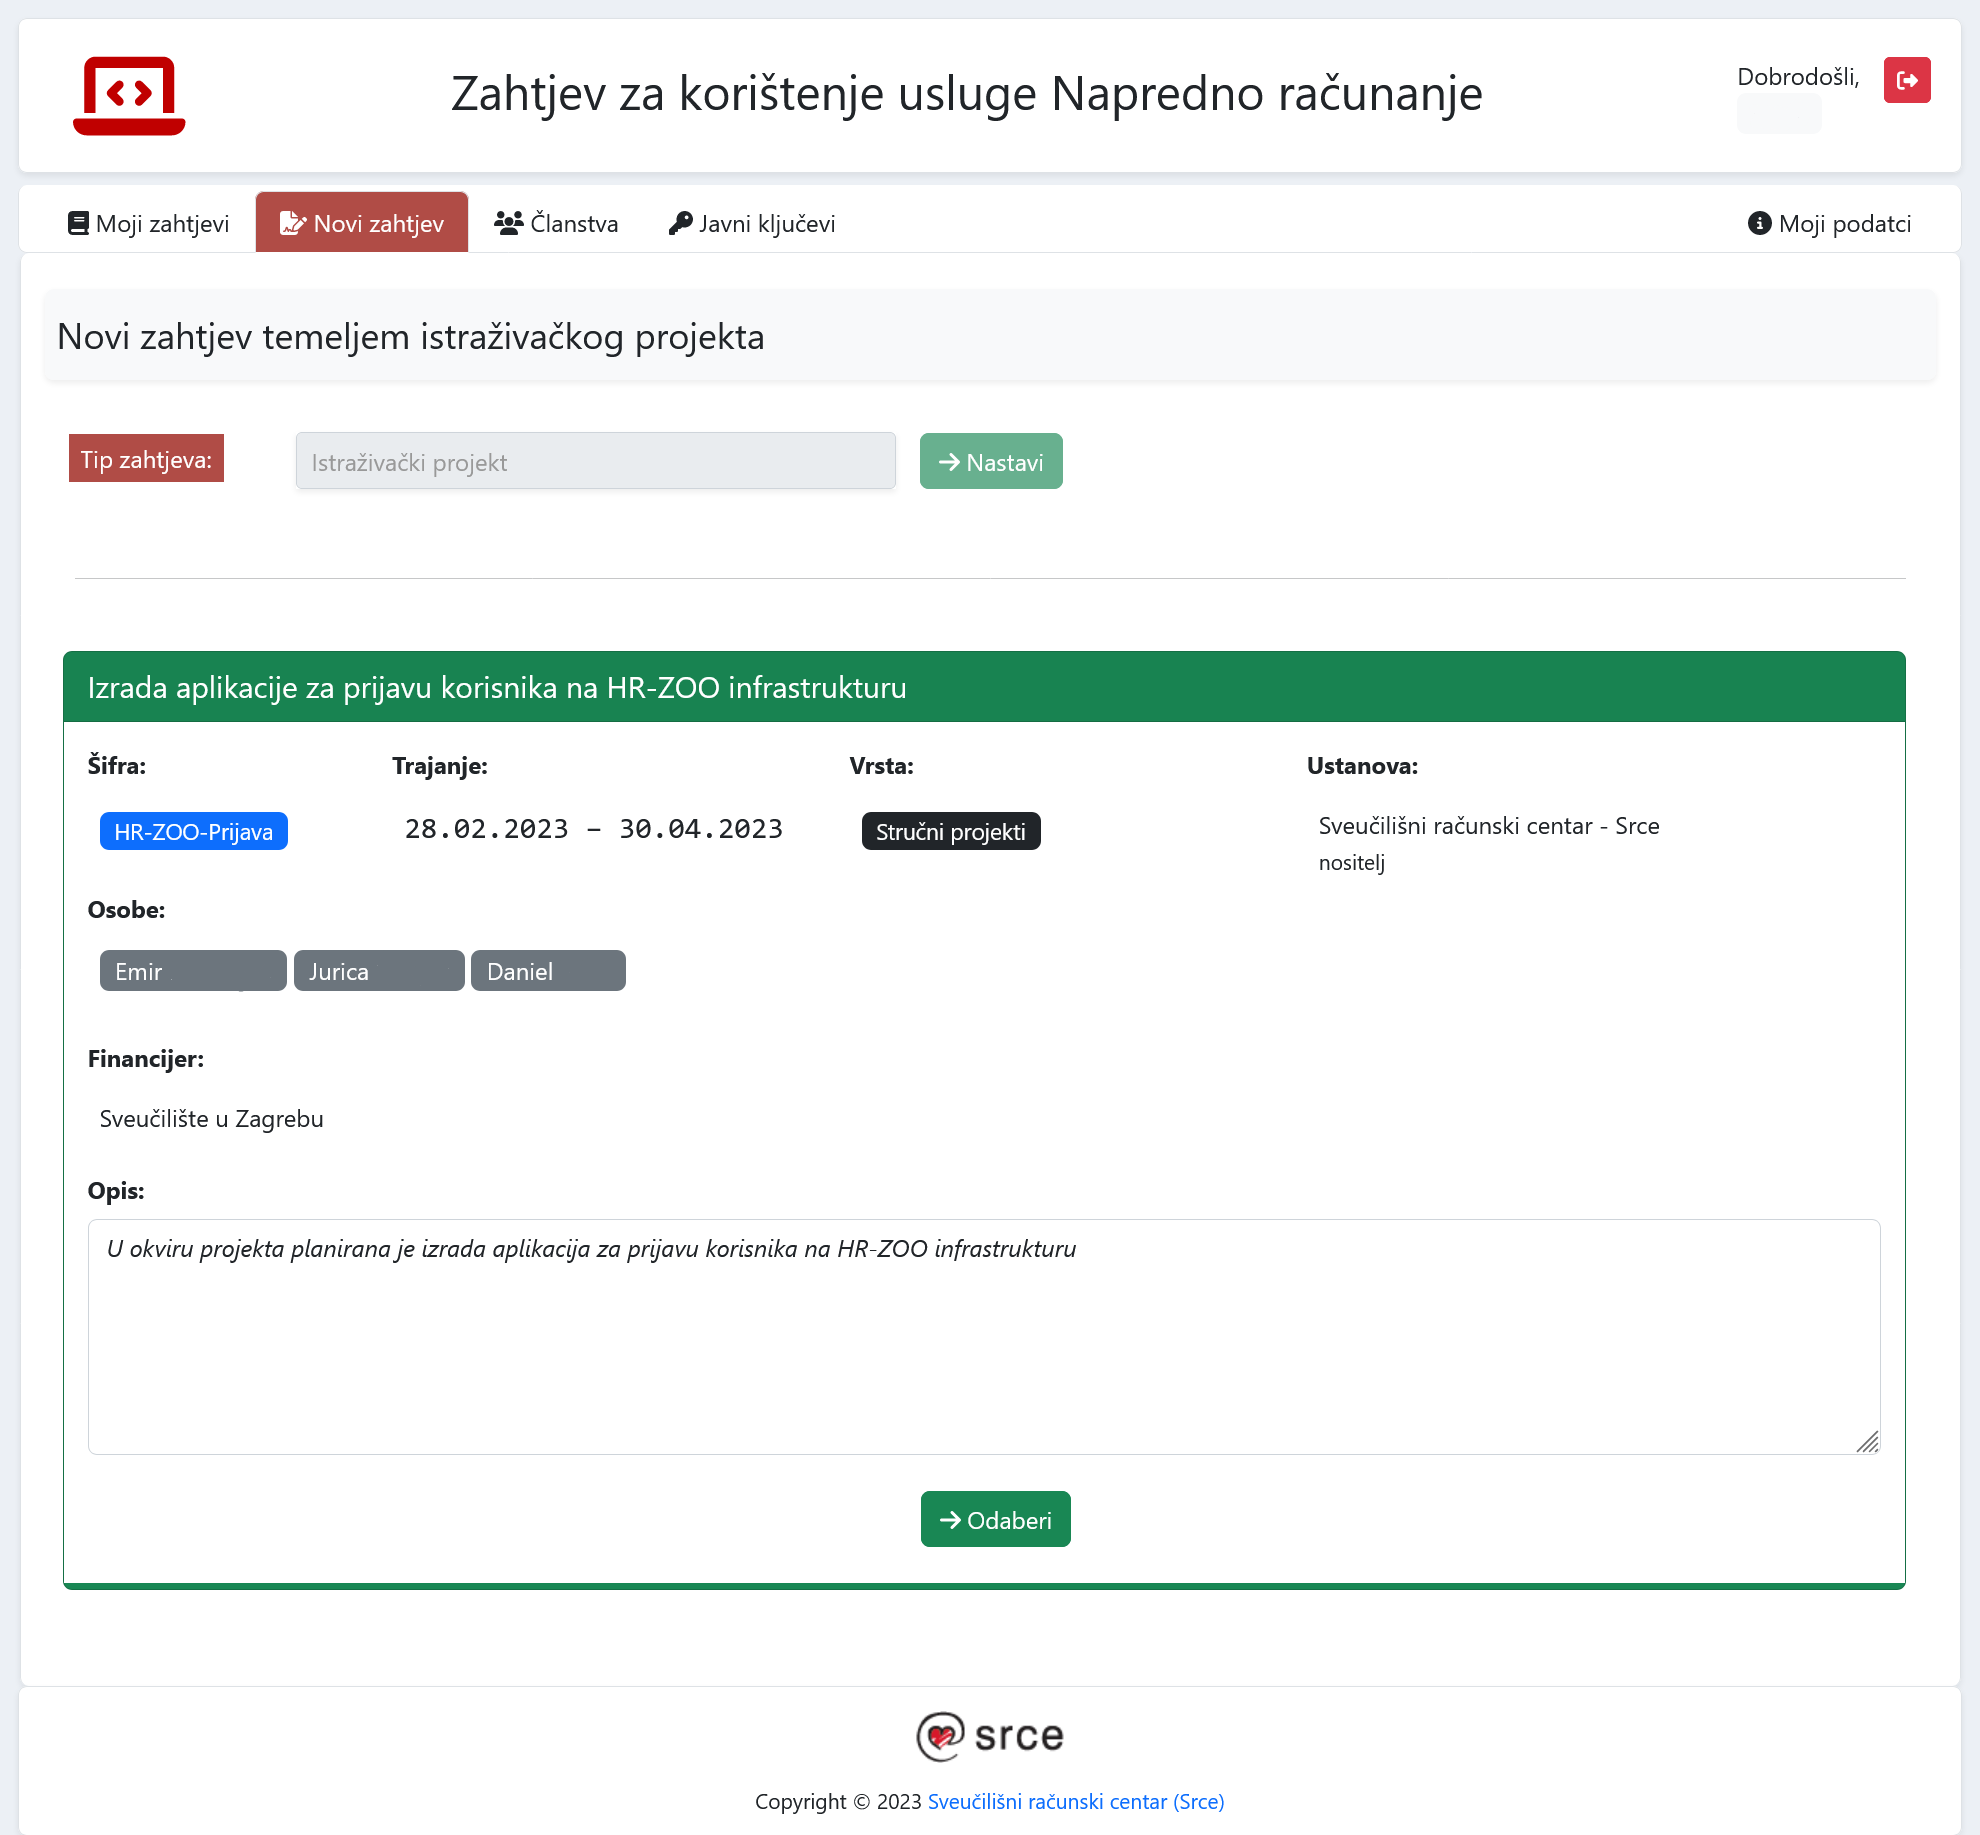
Figure 1. Request submission page in the web application
After the type of request and/or project has been selected, it is necessary to fill in the "General" part (continuation of the web application page Figure 2 and Figure 3):
- "Name" - the name of the project, work or practical lesson
- "Explanation" - explanation of why you need the advanced computing service
- "Usage period" - the planned period of use of the service
- "Scientific domain" - free assessment of the share in the scientific field/field in the research project/practical teaching
- "Scientific software" - which applications you plan to use
- "Resources" - Free estimate of the type and amount of resources you plan to use
- "Resource type" (multiple options can be selected):
- Supek (server specification overview):
- GPU - servers that contain graphics processors
- CPU - servers that contain a large number of CPU cores
- BIGMEM - servers with large memory capacity
- Vrančić (server specification overview):
- CLOUD - only servers
- CLOUD-GPU - servers that contain graphics processors
- CLOUD-BIGMEM - servers that contain a large memory capacity
- PADOBRAN
- YUPYTER
- Supek (server specification overview):
- HPC - if you plan to use the Supek supercomputer, try to estimate how many resources you need per job
- CLOUD - if you plan to use Vrančić and the cloud computing service, try to estimate the specification and amount of virtual servers
- "Resource type" (multiple options can be selected):

Figure 2. Part of the request page dedicated to the project details in the web application
Figure 3. Part of the request page dedicated to project details in the web application
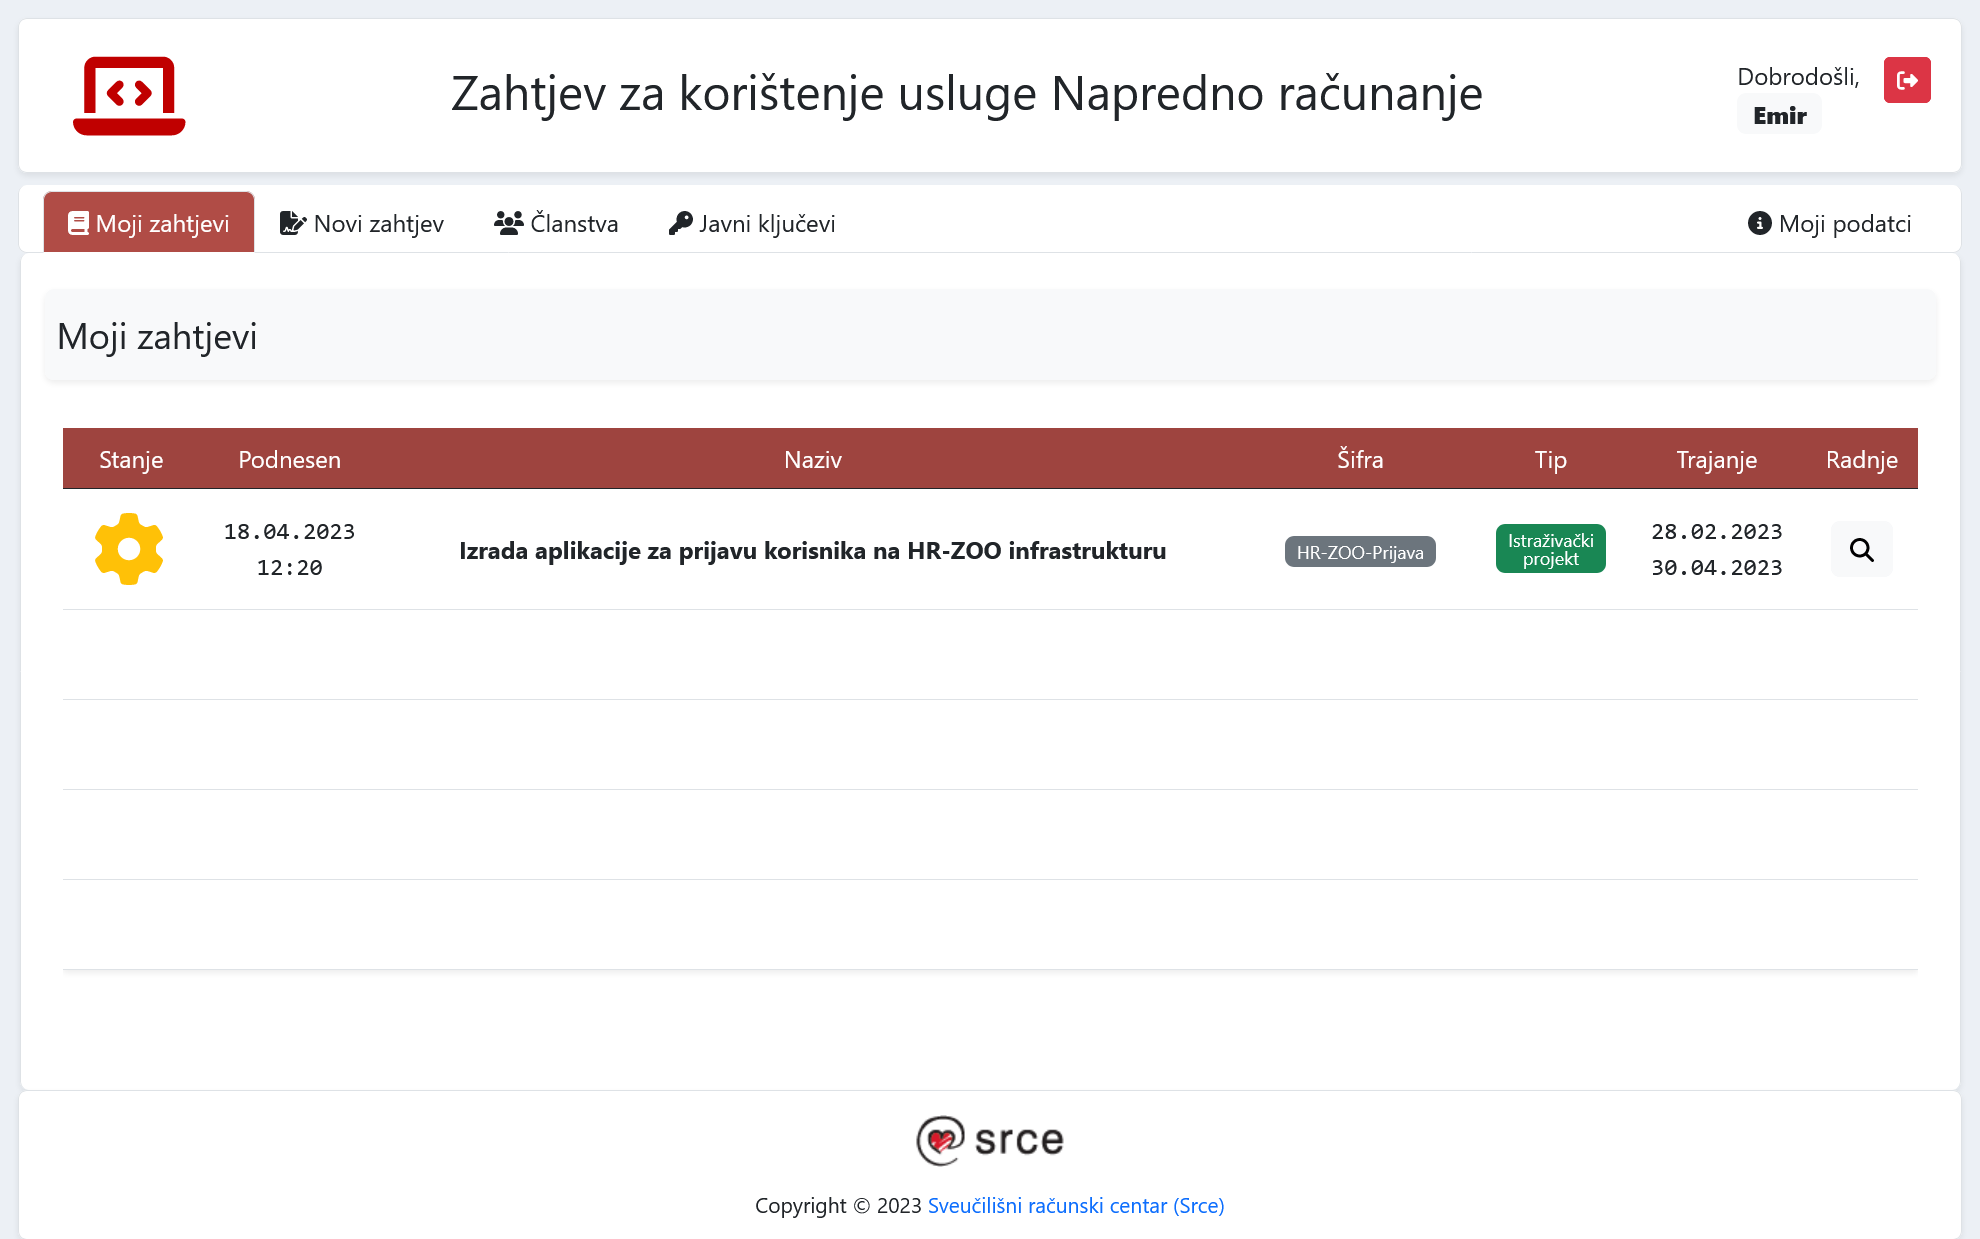
Figure 4. Part of the page with all requests in the web application
Adding collaborators
When the request for use is approved, it is possible to send invitations to other project participants via the "Membership" tab, the "Invite collaborators" button (red and blue buttons at the top and bottom of Figure 5), depending on the nature of the activity you have reported:
- Research project - If they are members of a research project, the participants must be registered in the CroRIS system and logged in to the project in order for the invitation to be possible
- Practical classes or Preparation of the final thesis - Participants do not need to be registered in the CroRIS system
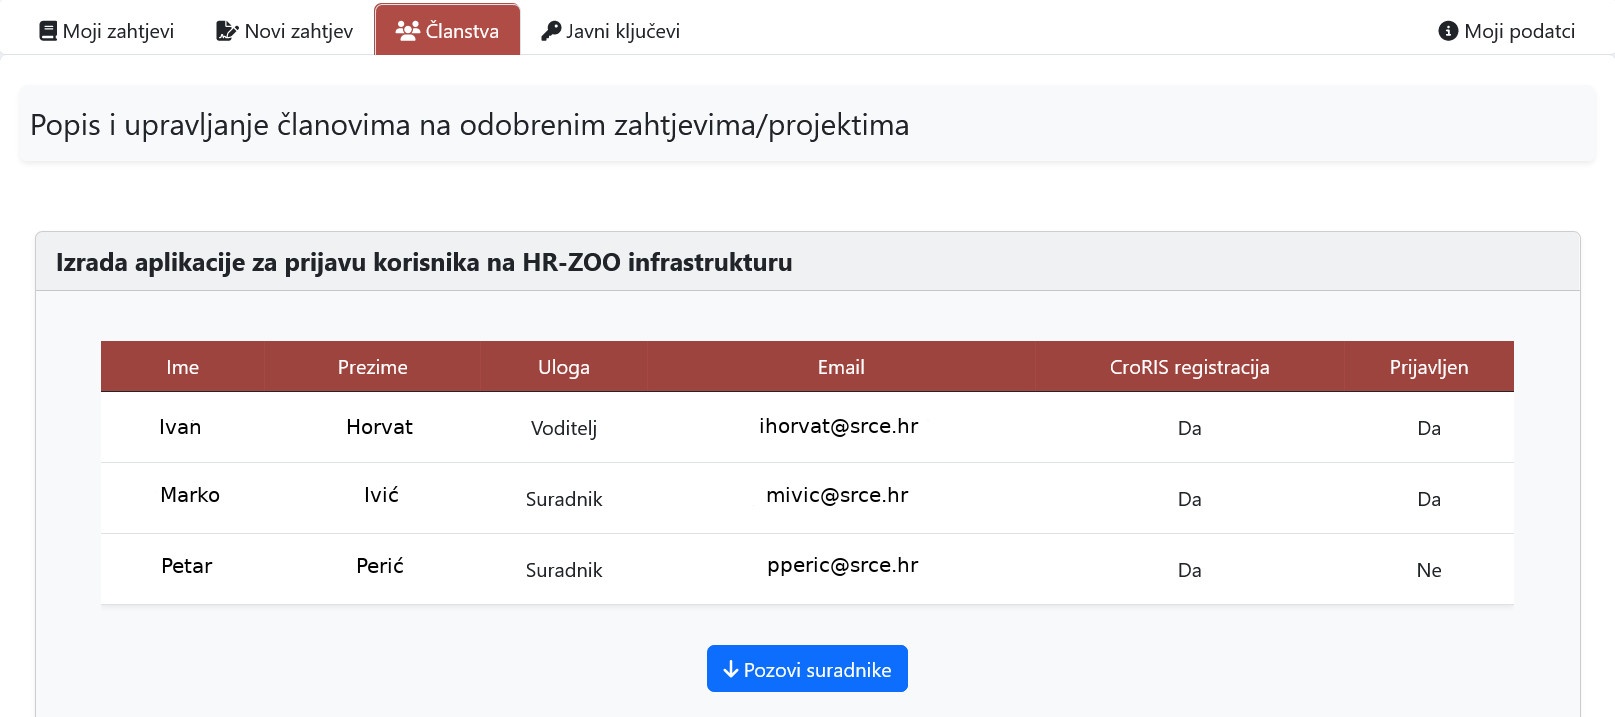
Figure 5. Page for adding collaborators in the web application
By pressing the blue "Invite collaborators" button, the option to enter an email will open (Figure 6). In the case of adding collaborators from the research project, it is possible to select only the members of the research project in CroRIS, while in the case of adding members of practical classes or creating a paper, it is possible to enter all email addresses. By pressing the green "Pošalji poveznice za prijavu"(engl. Send application links) button, one or more invitations will be sent to the selected/entered email addresses, which the participants must confirm with their AAI identity.

Figure 6. Selection of collaborators' email addresses
After sending the invitation to the collaborator/associate, the entry in the "Prijavljen"(engl. Registered) column will change to the image of a green envelope (Figure 7).
When participants confirm their registration by clicking on the link sent, the "Prijavljen"(engl. Registered) column will change from the green image of the envelope to "Yes"
Important!
The invitation is active 7 days after sending it to the collaborator/associate. If the associate does not confirm the invitation within that period, the invitation becomes inactive, it is automatically deleted, so it is necessary to send a new active invitation.
SSH key management
To access the Supek cluster via an SSH session, it is necessary to load the public part of the SSH key by pressing "Public keys"(red button at the top of Figure 8). Add the public part of the key (Figure 9) by pressing the green "Add public key" button. Instructions for creating SSH keys are available on the page for creating an SSH key pair or in video instructions:
- linux - ssh-keygen application
- windows - PuTTY Key Generator application
After adding the SSH key, you need to wait for the notification about the open account!
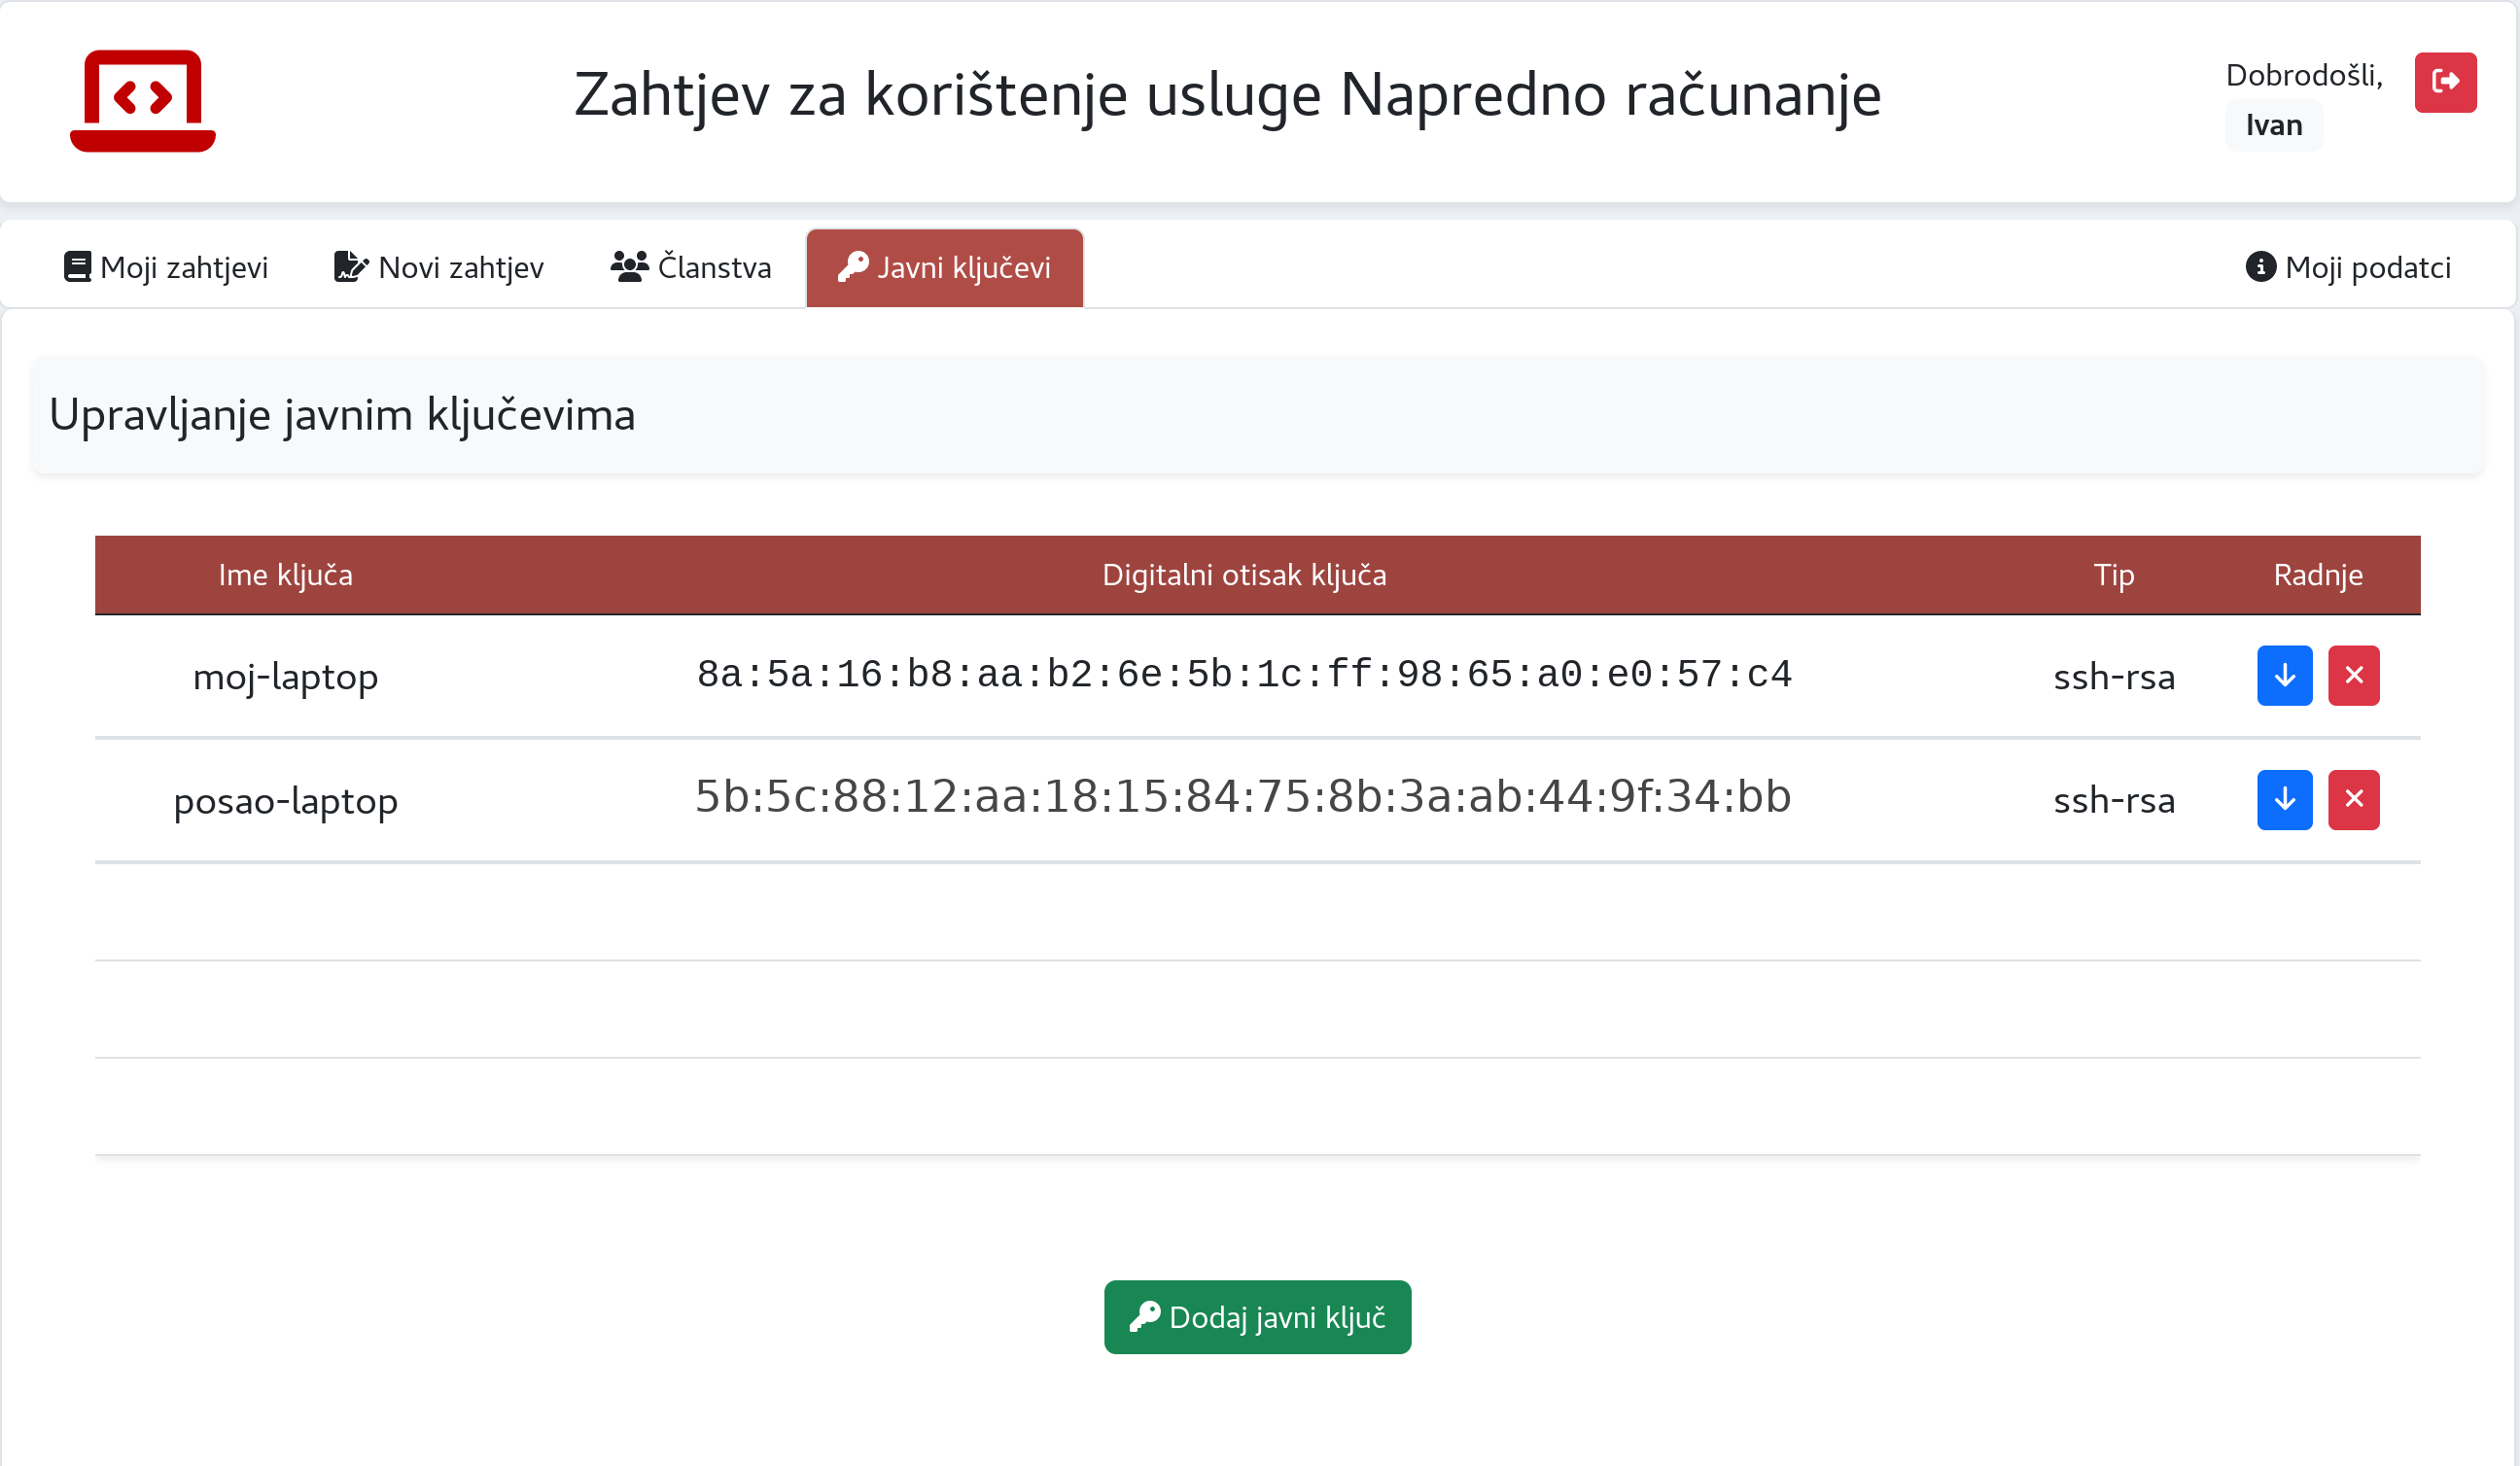
Figure 8. Page for adding SSH public keys in the web application
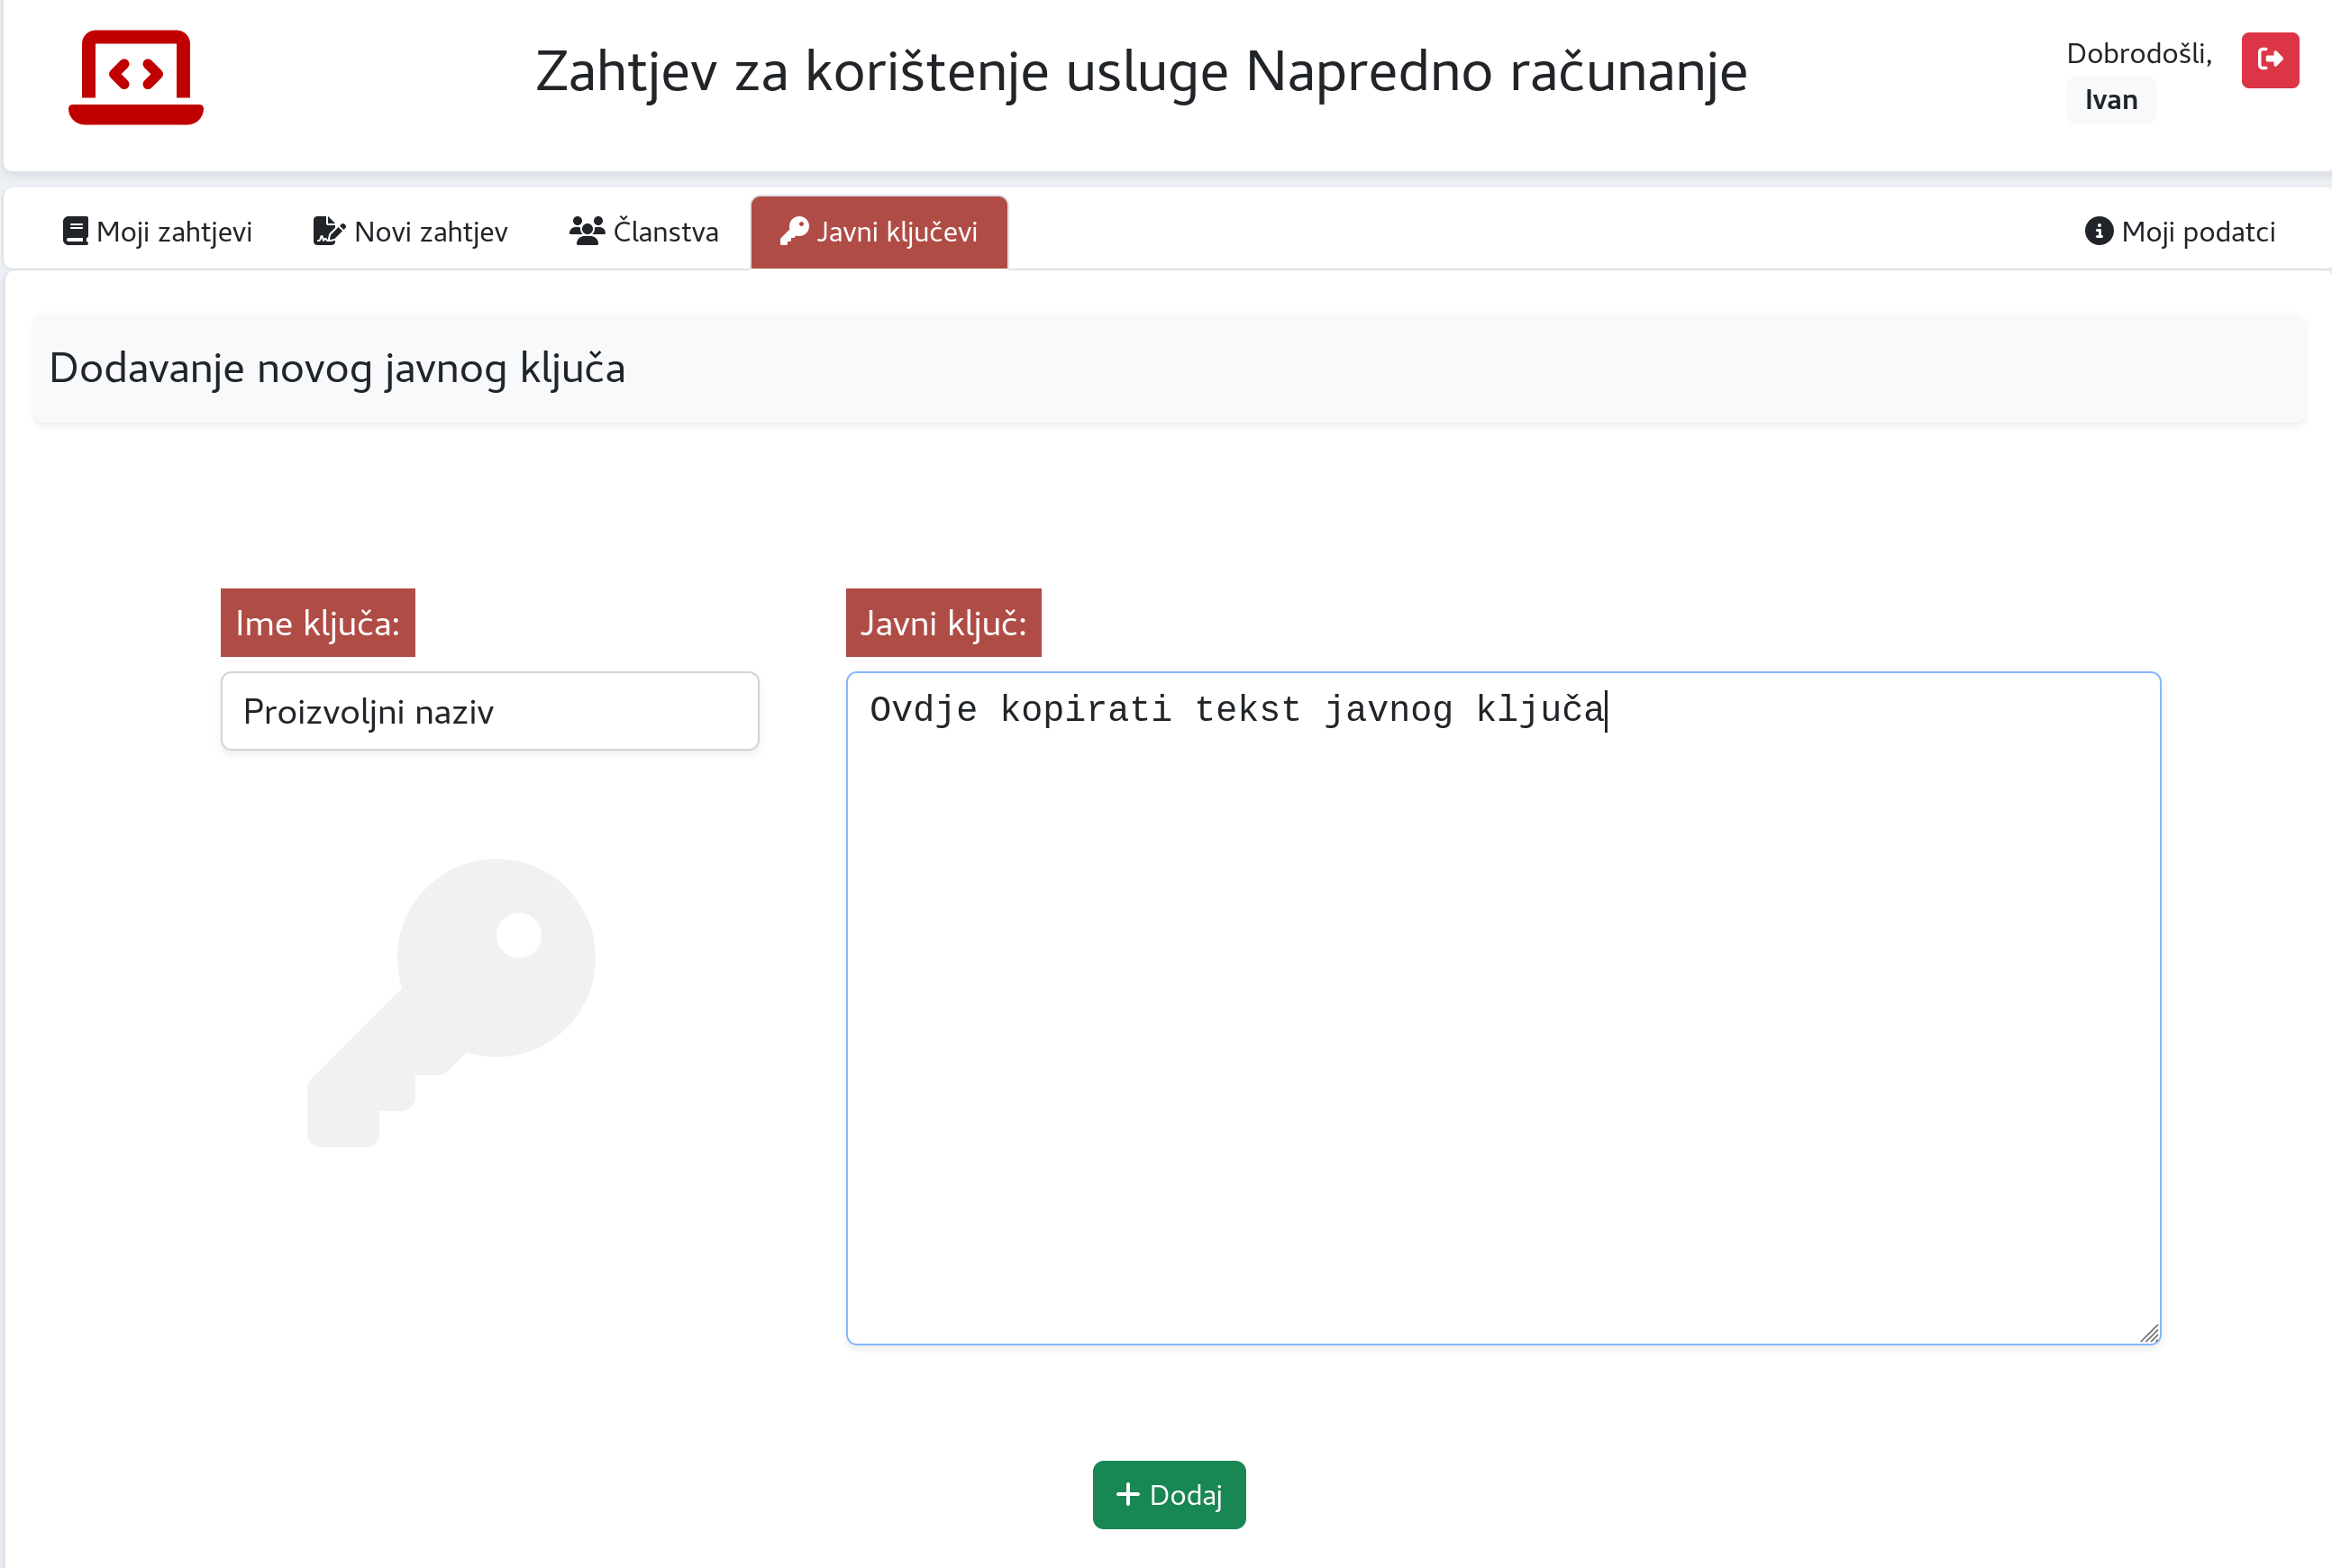
Figure 9. Adding a new public key in the web application(Ovdje kopirati tekst javnog ključa > engl. Copy the public key text here)

Video 1. Creating ssh keys and uploading them to a web application in Linux OS