...
| Section | ||||||||||||||||||
|---|---|---|---|---|---|---|---|---|---|---|---|---|---|---|---|---|---|---|
|

...
Figure 2. Activating or deactivating student cards
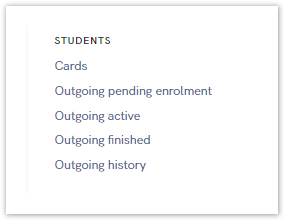
Outgoing pending enrollment
This option allows administrator to accept student's pending enrolments.
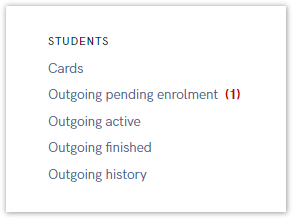
Figure 3. Active request in the "outgoing pending registration" option
In case there are new, active outgoing pending enrolments, the number of active requests next to the mentioned option.
| Info |
|---|
| The administrator can see all outgoing students whose course has not yet started (in statuses 1 to 6). For more information about status, please visit site: Status explanation |
There are two tabs in the outbound pending enrollment option:
- the Pending tab with a list of students awaiting action by the administrator and
- the Other Status tab, which shows students who have applied for a course or joint program, but have been rejected or have withdrawn from the course.

Figure 4. List of students with pending enrolments
For administrator to accept or denies student's pending enrolment, the pending tab must be selected, then the plus sign (option Insepct) as shown on the Figure 4.
A new screen appears with the following information:
- student's name and surname,
- the receiving university,
- the course the student wants to enroll in,
- academic year,
- ECTS credit,
- course start and end date,
- method of attendance,
- and status (1-enrolled).
After reviewing the information, administrator takes a action: approve or denies student's application.
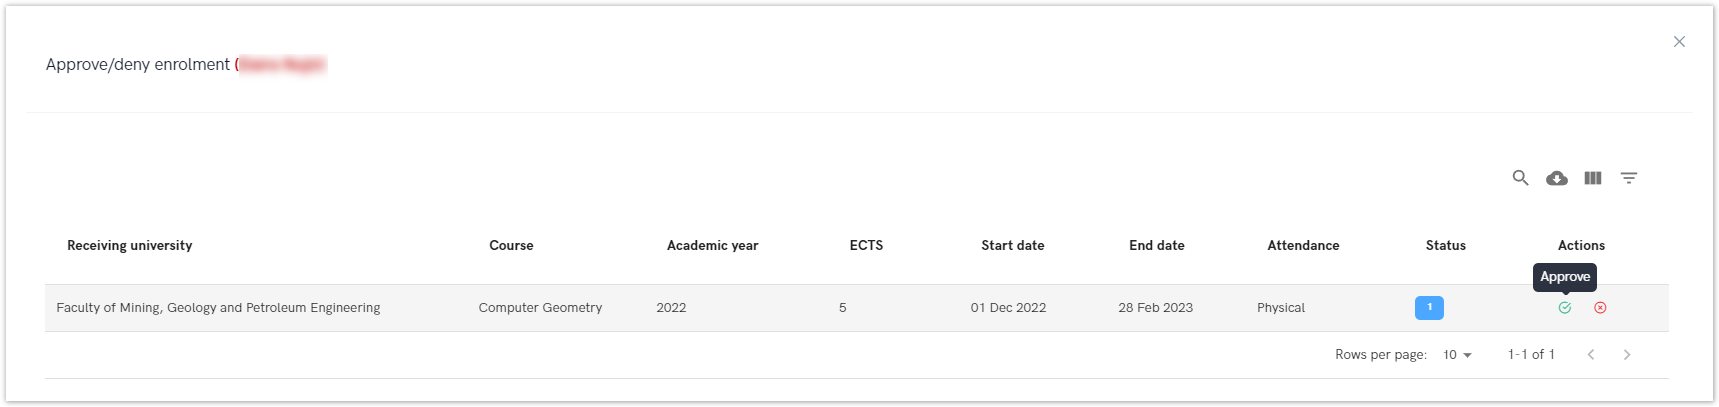
Figure 5. Approving or denying student's outgoing enrolment
In the Other statuses tab, the administrator can check the information for students who have been rejected or have dropped out of the course (before the course has started).
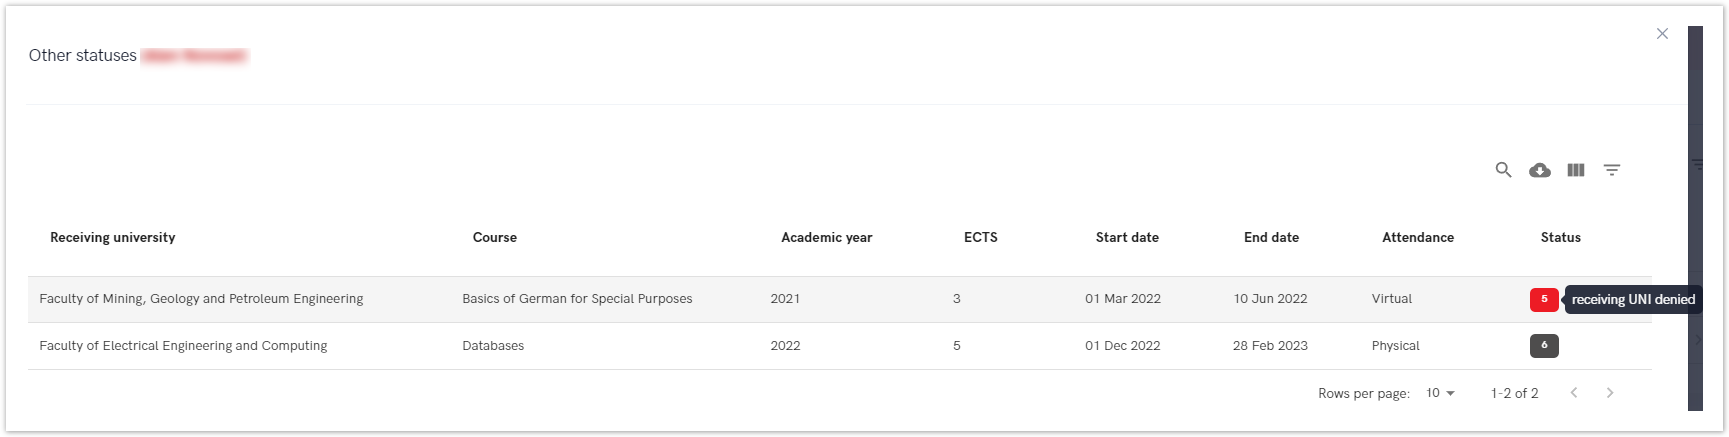
Figure 6. The other statuses tab
Outgoing active students
Outgoing active students option allows administrator to view information about all those outgoing students whose course had started.
| Info |
|---|
| The administrator can see all outgoing students who have started the course (course is in status 7, course date has started). For more information about status, please visit site: Status explanation |
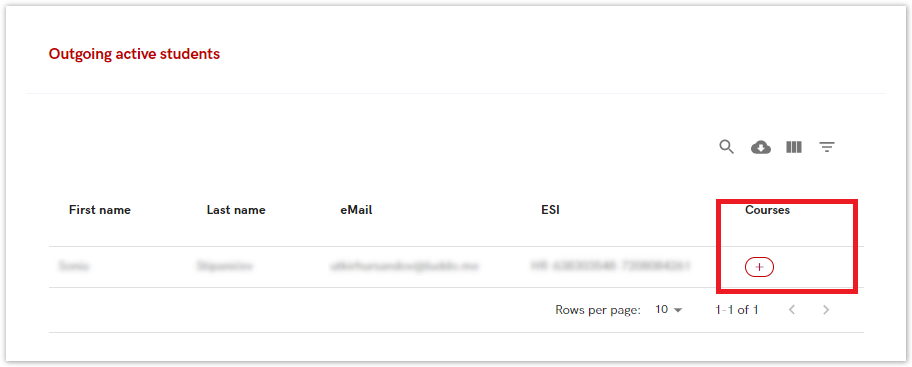
Figure 7. Choosing the inspect option in order to view details
After selecting option Inspect (plus sign), a new screen appears with the following information:
- student's first and last name
- the receiving university,
- the course the student was enrol in,
- academic year,
- ECTS credit,
- course start and end date,
- date of enrloment
- method of attendance,
- and status (7 - student enroled, attending the course)
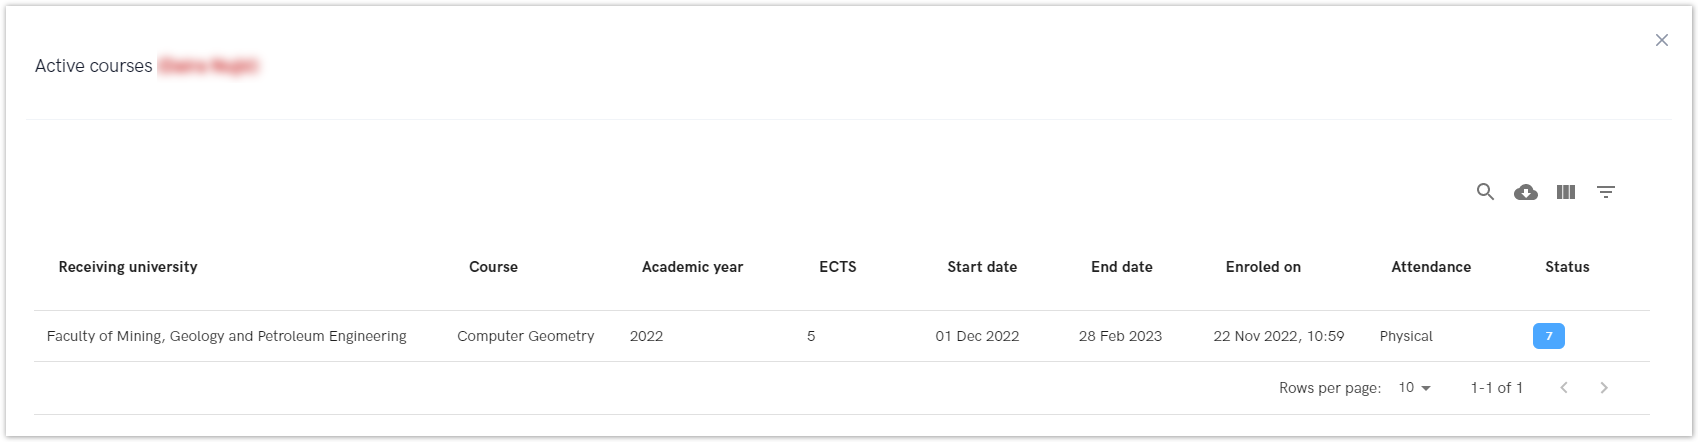
Figure 8. Information about active courses for outgoing students
Outgoing finished
Outgoing finished option gives an overview of a students who had finished course and got the grade.
| Info |
|---|
| The administrator can see all outgoing students who have finished |
...
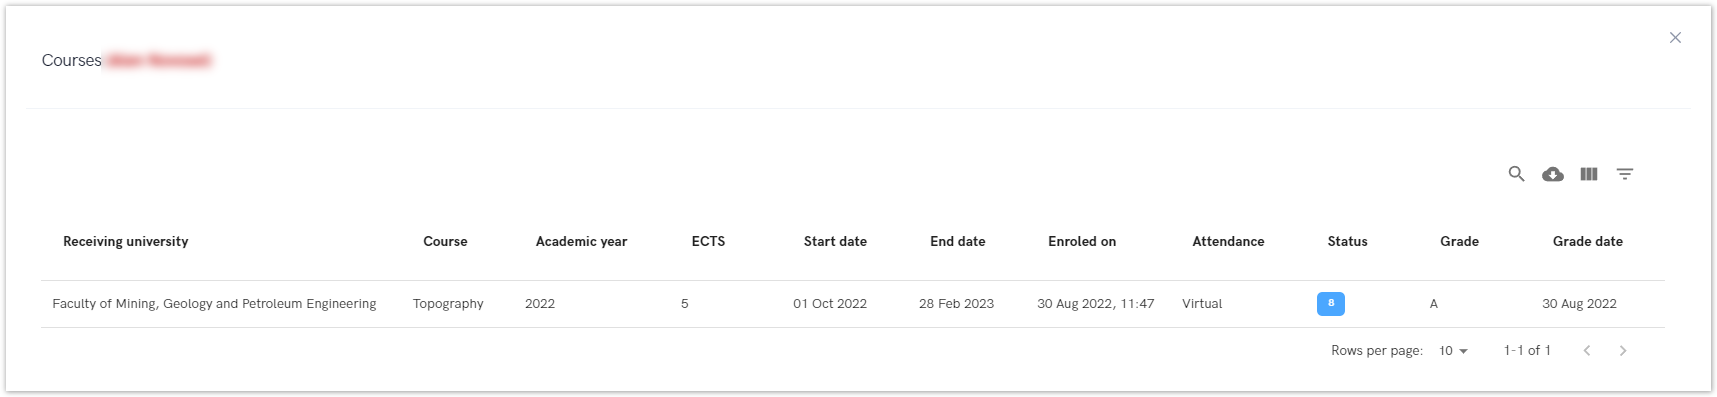 Figure.
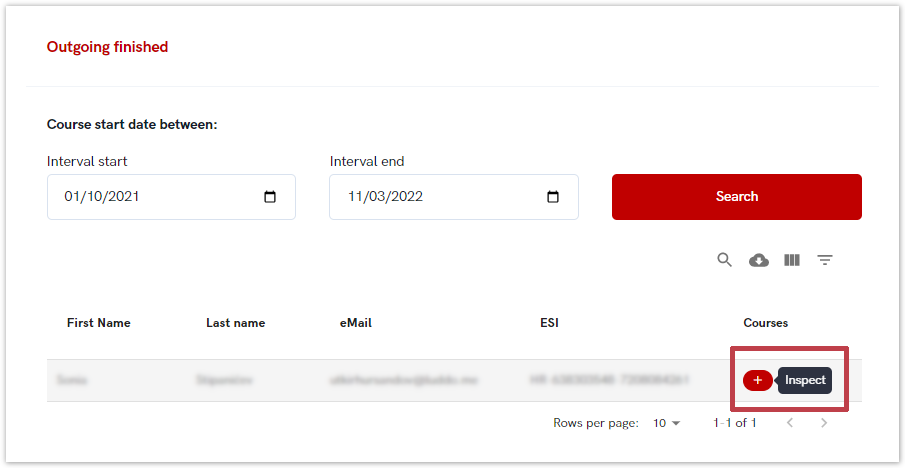
Figure.

Outgoing history
...
| the course (course is in status 8, course date has ended and the grade has been obtained). For more information about status, please visit site: Status explanation |
To view the information, the administrator must set a time interval.
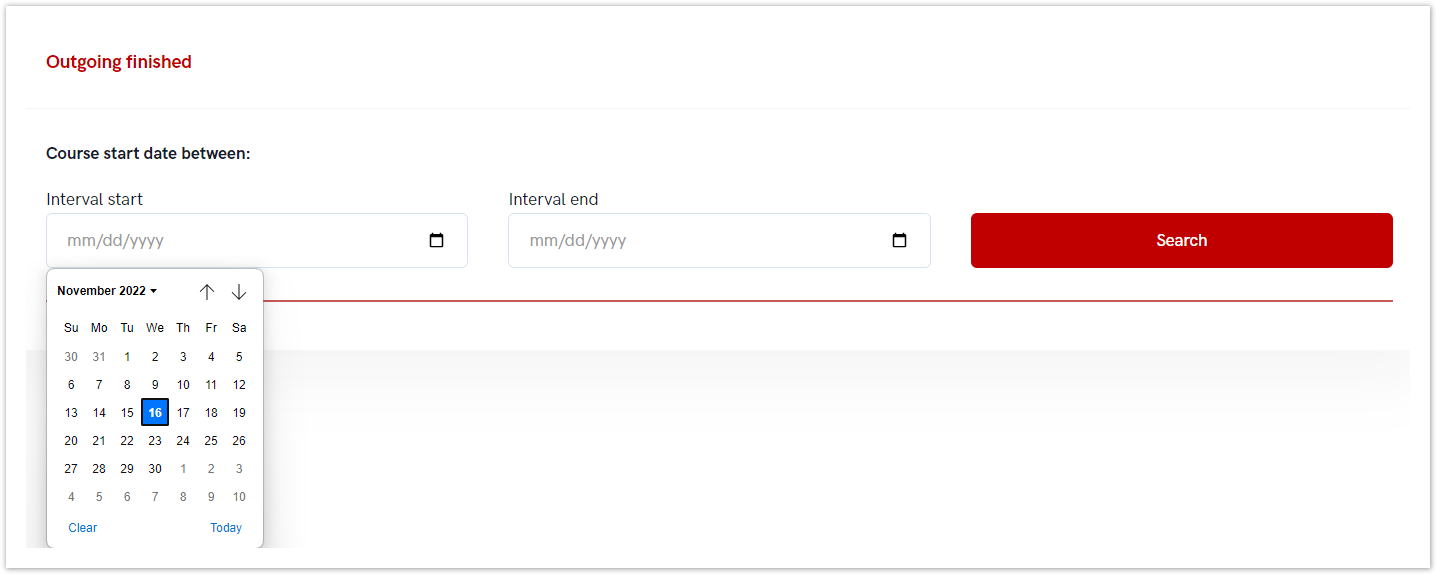
Figure 9. Setting the desired time range
If there are records matching the search criteria, the data is displayed below and the administrator must select the view option to see the details.
In order to view details, administrator must choose the inspect option (plus sign).
Figure 10. Choosing the inspect option in order to view details
A new screen appears with the following information:
- student's name and surname,
- the receiving university,
- the course the student was enrol in,
- academic year,
- ECTS credit,
- course start and end date,
- date of enrolment
- method of attendance,
- status (8-completed/passed)
- grade
- grade date
Figure 11. Information about course for outgoing finished student
Outgoing history
Outgoing history option gives an overview of a students who had applied for the course but have been denied or have gave up the course, and that course had started more than 30 days ago.
| Info |
|---|
| The administrator can see all courses who had started more than 30 days ago and are in statuses 1 to 6. For more information about status, please visit site: Status explanation |
To view the information, the administrator must set a time interval.
If there are records matching the search criteria, the data is displayed below and the administrator must select the view option to see the details.
In order to view details, administrator must choose the inspect option (plus sign).

Figure 12. Choosing the inspect option in order to view details
A new screen appears with the following information:
- student's first and last name
- the receiving university,
- the course the student was enrol in,
- academic year,
- ECTS credit,
- course start and end date,
- method of attendance, and
- status (statuses 1 to 6).

Figure 13. Information about course history for outgoing finished student